
What is this chapter for? I hope to use this first chapter to act as a primer for all other chapters and projects in the book. I would like you to use the introduction as a common resource containing all of the resources shared by the projects in the book.
The introduction will cover the installation of third-party software, libraries, helpers, and so on, that are required by the projects in the later chapters. By keeping these resources in this chapter, the projects aren't swamped with repetitive code and the project code can be kept as clean and concise as possible.
In this chapter, we will cover the following topics:
The common resources used in this book are discussed in upcoming sections.
Every project in the chapters in this book uses Twitter Bootstrap. We will download Bootstrap and find a good place for it in our filesystem. We will then create the header and the footer files. All projects in the book will call these header and footer files (using the CodeIgniter function $this->load->view() to display views). However, these projects will not actually contain the code for the header and footer—only the working code between the header and footer (what you might think of as the stuff in between the
and tags) will be detailed in each project.The menus will be different for individual projects. In the header file, we will include the code to display the menu, but the actual HTML contents for the menu will be included in each project's chapter. The footer file contains the closing HTML markup for each page.
We'll need a copy of CodeIgniter to start with. This book isn't really aimed at the beginner, so the chances are reasonably high that you already have a copy of CodeIgniter installed or at least know your way around enough to skip this part; however, it does make sense to briefly go through the installation of CodeIgniter so that we have something to talk about in later chapters!
First things first, go to https://ellislab.com/codeigniter/user-guide/installation/downloads.html. You'll see something similar to what is shown in the following screenshot. This is the CodeIgniter download page. At the time of writing, the current CodeIgniter version is 2.2.0; this is why the screenshot says Current version next to version 2.2.0; however, whichever version is the latest when you're reading this book is the version you want to use.
Click on the Current version link, and CodeIgniter will begin to download.
Once it's downloaded, navigate to where you have saved the file; this will be a compressed archive. Unpack it and move the contents of that file to a folder within your web root.
Specific details of routing, configuration, and database use are in each chapter (these details are specific to that particular chapter).
You may experience errors if you run CodeIgniter on newer versions of PHP. There is a hack for this that is explained at https://ellislab.com/forums/viewthread/244510/. A poster called milan.petrak has described a work around. It can be summed up as follows:
$_config[0] =& $config; with return $_config[0]; return $_config[0] =& $config;
This will likely be permanently fixed in later releases of CodeIgniter, but for now, this is the fix.
Twitter Bootstrap is a frontend HTML5 framework that allows anyone to easily construct reliable interfaces. At the time of writing, the version of Bootstrap used is version 3.1.1.
We will use Twitter Bootstrap throughout this book to provide the framework for all view files and templates. We will look at how to download Twitter Bootstrap and how to install it in the CodeIgniter filesystem.
Firstly, we will need to download the Twitter Bootstrap files. To do that, perform the following steps:
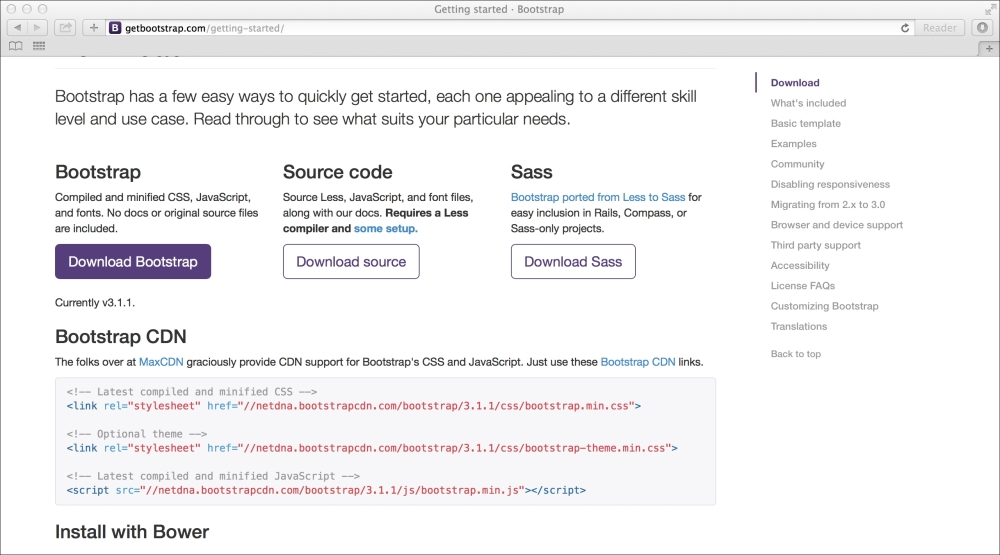
Once the download is finished, go to its location on your machine and unpack the archived file. Inside the unpacked file, you should see something similar to what is shown in the following structure:
bootstrap/ ├── css/ │ ├── bootstrap-theme.css │ ├── bootstrap-theme.css.map │ ├── bootstrap-theme.min.css │ └── bootstrap.css │ └── bootstrap.css.map │ └── bootstrap.min.css ├── js/ │ ├── bootstrap.js │ └── bootstrap.min.js └── fonts/ ├── glyphicons-halflings-regular.eot ├── glyphicons-halflings-regular.svg ├── glyphicons-halflings-regular.ttf └── glyphicons-halflings-regular.woff
Move the bootstrap folder to your CodeIgniter installation so that the file hierarchy looks like the following:
/path/to/web/root/ ├── application/ └── views/ ├── common ├── header.php ├── footer.php ├── system/ ├── bootstrap/ ├── index.php ├── license.txt
In the preceding tree structure, the application and system directories are to do with CodeIgniter, as are the index.php and license.txt files; however, the bootstrap directory contains the contents of your Bootstrap download.
I have also indicated the location of the common header.php and footer.php files. These files are used throughout the book and act as a wrapper for every other view file.
It is possible to remove index.php from the web browser address bar when CodeIgniter is running. This can be done by following these steps:
touch /path/to/CodeIgniter/.htaccess
ren "C:\path\to\CodeIgniter\file.htaccess" .htaccess
RewriteEngine on RewriteCond $1 !^(index\.php|images|robots\.txt) RewriteRule ^(.*)$ index.php/$1 [L]
For a long time, you had to search the Internet and download code from various places—blogs, code repositories, and so on—to find and use extensions, libraries, and other useful snippets of code for CodeIgniter. Useful installations for CodeIgniter were spread across the Internet; as such, they might have been hard to locate. Sparks acts as a single point of reference for extensions of CodeIgniter. It's simple to install and use and contains thousands of useful add-ons for CodeIgniter:
php -r "$(curl -fsSL http://getsparks.org/go-sparks)"
If your installation was successful, you should see something similar to the following:
user@server:/path/to/codeigniter$ php -r "$(curl -fsSL http://getsparks.org/go-sparks)" Pulling down spark manager from http://getsparks.org/static/install/spark-manager-0.0.9.zip . Pulling down Loader class core extension from http://getsparks.org/static/install/MY_Loader.php.txt . Extracting zip package . Cleaning up . Spark Manager has been installed successfully! Try: `php tools/spark help`
Now that Sparks is installed in your CodeIgniter instance, you can begin to install extensions and packages.
To install a package from Sparks, type the following in the command-line window:
php tools/spark install [Package Version] Spark Name
Here, Package Version is the specific version of the Spark you wish to install. You are not required to state the version and, if you it out, Sparks will download the latest version by default. Spark Name is the name of the Spark you wish to install; for example, to install example-spark (version 1.0.0), which comes with the default installation, type the following in the command-line window:
php tools/spark install -v1.0.0 example-spark
If the installation was successful, you should see something similar to the following:
user@server:/path/to/codeigniter$ php tools/spark install -v1.0.0 example-spark [ SPARK ] Retrieving spark detail from getsparks.org [ SPARK ] From Downtown! Retrieving spark from Mercurial repository at https://url/of/the/spark/repo [ SPARK ] Spark installed to ./sparks/example-spark/1.0.0 - You're on fire!
Every project throughout this book will use the common header and footer files that we will create here; navigation menus will be different for each project and, as such, we will build these in the project's chapter themselves. But for now, let's look at the common header and footer files: